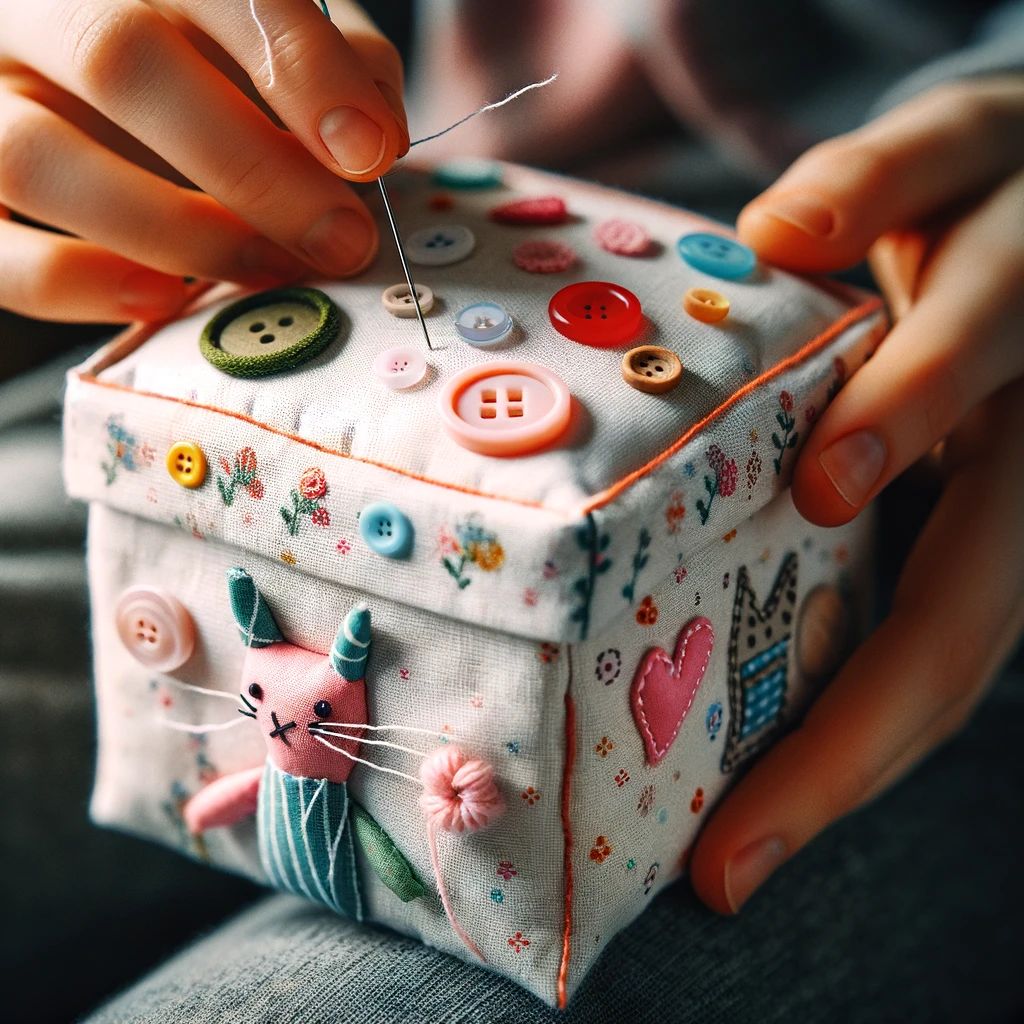
Many people are confused about how to sew a fabric toy box. Creating a fabric toy box is not just a practical storage solution; it’s also a fun and creative sewing project. Whether you’re a seasoned seamstress or a beginner, this guide will walk you through the process of making a charming and durable toy box that will brighten up any child’s room.
Key Takeaways:Learn essential sewing techniques for fabric toy boxes. Understand material selection and design customization. Discover advanced sewing methods for added functionality.
Introduction to Fabric Toy Boxes
Fabric toy boxes are versatile, customizable, and a fantastic way to keep children’s play areas organized. Unlike plastic or wooden boxes, fabric boxes can be made in various sizes and designs to match room decor and personal preferences.
Why Choose Fabric Toy Boxes?
- Customizable: Tailor them to any size or style.
- Soft Material: Safer for kids compared to hard alternatives.
- Decorative: Enhances the room’s aesthetics.
Materials and Tools Needed
To start, gather the following materials and tools:
- Fabric: Choose durable and easy-to-clean options like cotton or canvas.
- Interfacing: Provides structure to the toy box.
- Sewing Machine: Essential for quick and neat stitching.
- Basic Sewing Kit: Includes needles, thread, scissors, and measuring tape.
Choosing the Right Fabric
Selecting the right fabric is crucial. Consider patterns and colors that are appealing to children and match the room’s decor. Washable fabrics are preferable for easy maintenance.
Basic Sewing Techniques for Toy Boxes
Getting Started with Sewing
- Straight Stitch: The foundation of sewing fabric toy boxes.
- Box Corners: Essential for creating the box shape.
- Adding Handles: For easy carrying.
Step-by-Step Guide
- Cutting Fabric: Measure and cut the fabric according to the desired size.
- Sewing Sides: Use a straight stitch to join the sides.
- Creating Corners: Fold and stitch the corners to form the box shape.
Designing Your Toy Box
Designing a toy box that children will love involves creativity and understanding their preferences.
Incorporating Fun Elements
- Themes: Choose popular characters or colors.
- Interactive Features: Add pockets or labels for organization.
Advanced Sewing Techniques
Complex Designs and Features
- Lid Creation: Sew a lid to keep toys dust-free.
- Partitioning: Add dividers for better organization.
Detailed Instructions
- Lid Sewing: Attach the lid using hinges made from fabric.
- Adding Partitions: Sew in dividers according to the required sizes.
Decorative Elements and Personalization
Enhancing Aesthetics
- Embroidery: Add names or decorative patterns.
- Appliques: Use fabric shapes for a playful look.
Personalizing for Kids
Personalization makes the toy box special. Add names, favorite colors, or characters to make it uniquely theirs.
Finishing and Maintenance Tips
Proper Finishing Techniques
- Edges: Ensure all edges are neatly hemmed.
- Reinforcement: Reinforce handles and corners for durability.
Cleaning and Maintenance
Regular cleaning extends the life of the toy box. Use washable fabrics and consider removable linings for ease of cleaning.
Additional Sewing Techniques and Ideas
Expanding Design Options
- Multiple Compartments: Create sections for different types of toys.
- Foldable Designs: Sew toy boxes that can be collapsed for easy storage.
Sewing Multiple Compartments
- Plan Layout: Decide on the number and size of compartments.
- Sew Dividers: Integrate fabric dividers within the toy box.
Creating Foldable Toy Boxes
- Flexible Materials: Use materials that are easy to fold.
- Velcro Straps: Attach straps to keep the box folded when not in use.
Personalized Touches for a Unique Toy Box
Adding Names and Monograms
- Embroidery Techniques: Stitch the child’s name or initials.
- Fabric Letters: Cut out letters from different fabrics and sew them on.
Themed Toy Boxes
- Character Themes: Incorporate favorite cartoon or movie characters.
- Color Themes: Use the child’s favorite colors for a personal touch.
Maintenance and Care
Easy Cleaning Tips
- Removable Linings: Use linings that can be taken out and washed.
- Stain-Resistant Fabrics: Select fabrics that resist stains and spills.
Long-Term Care
- Regular Checks: Inspect seams and handles periodically for wear.
- Storage Advice: Store in a dry place to prevent mold and mildew.
Frequently Asked Questions:
How do I choose the right fabric for a toy box?
Select a fabric that is durable, easy to clean, and visually appealing. Cotton, canvas, and upholstery fabrics are excellent choices.
Can I add a lid to the toy box?
Yes, you can sew a lid using the same or complementary fabric. Consider adding a soft-close mechanism for safety.
How can I make the toy box more durable?
Reinforce the seams, especially around the corners and handles. Use quality threads and interfacing for additional strength.
Is it possible to make a foldable fabric toy box?
Absolutely! Choose flexible materials and incorporate elements like velcro or ties to keep the box folded when not in use.
Can I personalize the toy box for my child?
Yes, personalize it with embroidery, appliques, or themed designs that reflect your child’s interests or favorite colors.
This comprehensive guide on how to sew a fabric toy box covers everything from the basics of sewing and material selection to advanced techniques and personalization. By following these steps and tips, you can create a unique and functional toy box that adds charm and organization to any child’s room.