Hats have always been a popular accessory, and making your own can add a unique touch to your style. However, the thought of sewing one from scratch may seem daunting for beginners. Fear not! With the right materials and some basic skills, you can easily sew yourself a stylish hat that will make heads turn. In this blog post, we’ll guide you through the steps on how to sew a hat for beginners in no time! So grab your fabric and let’s get started!
Introduction to Sewing Hats
Sewing hats is a great way to add your own personal touch to any outfit. Not only are they stylish and unique, but they can also be quite easy to make! In this article, we’ll show you how to sew a hat for beginners.
We’ll start by walking you through the basics of sewing a hat. You’ll need to gather some supplies, including fabric, scissors, needle and thread, and a measuring tape. Once you have your supplies, you’ll need to measure your head to determine the size of the hat.
Next, you’ll cut out a circular piece of fabric for the top of the hat and two strips for the sides. Sew the side strips together at the seams, then attach them to the top piece of fabric. Finish off by sewing the top and bottom edges of the hat together.
Now that you know how to sew a basic hat, experiment with different fabrics and styles to create a look that’s all your own!
Essential Materials and Tools for Sewing a Hat
Assuming you want to sew a basic hat, you will need:
-1/4 yard of fabric (preferably a medium to heavyweight cotton or linen)
-Scissors
-Pins
-Needle and thread
-1/2 yard of ribbon or trim (optional)
If you have a sewing machine, you may find it helpful to use it for some steps, but it is not necessary.
To begin, cut a circle out of your fabric. The best way to do this is to fold your fabric in quarters, then cut a semi-circle out of the folded edge. Once you have your semi-circle, open it up and you will have a perfect circle.
Next, cut a 2-3 inch strip of fabric from the edge of your circle. This will be used to create the brim of your hat. Fold the strip in half lengthwise and sew the long side together with a needle and thread or sewing machine. Then, turn the tube inside out so that the seam is hidden.
Now it’s time to attach the brim to the rest of your hat. Starting at one side of the brim, pin it to the edge of your fabric circle. Continue pinning around until you reach the other side of the brim. Sew the brim onto the fabric circle using a needle and thread or sewing machine. Be sure to leave about an inch opening at one point so that you can turn your

Tips for Sewing a Hat
Assuming you would like tips for sewing a hat:
- Choose the right fabric: not all fabrics are created equal and some are better suited for hats than others. Look for something stiffer rather than drapey, like canvas, denim, or wool.
- Consider lining your hat: this will help it hold its shape and prevent sweat from ruining the outside fabric.
- Make a pattern first: before cutting into your fabric, create a template or pattern so you know exactly what pieces you need and how they should fit together. This will save you time and frustration in the long run.
- Pay attention to details: things like brim size and placement of embellishments can make or break a good hat design. Make sure everything is symmetrical and in the right spot before sewing it all together.
- Take your time: sewing a hat is not a race! Rushing through the process will likely result in an inferior product. Slow down, relax, and enjoy the process of creating something unique and fabulous.
Different Ways to Sew a Hat

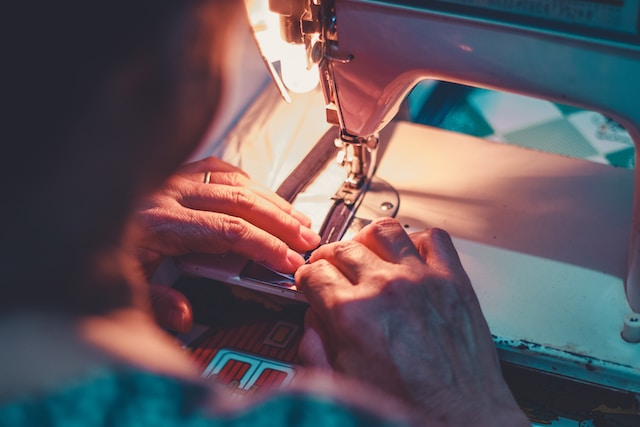
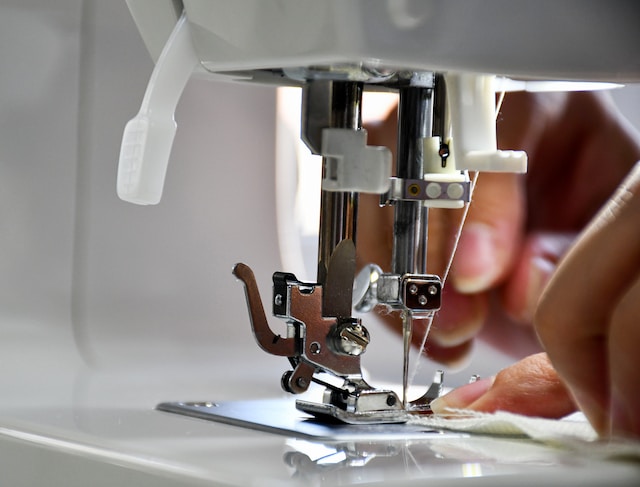
There are many different ways that you can sew a hat. The most common way is to use a sewing machine, but you can also hand-sew your hat. If you are using a sewing machine, you will need to gather your materials and thread your machine. Then, you will want to measure the circumference of your head and cut a piece of fabric that is twice as wide as that measurement. Next, you will fold the fabric in half and sew the two sides together. Once you have sewn the two sides together, you will want to turn the fabric right side out and try it on for size. If it fits, you can then proceed to sew the brim of the hat onto the body of the hat. However, if it does not fit, you will need to adjust the sizing before proceeding.
If you are hand-sewing your hat, you will follow many of the same steps as above. However, instead of using a sewing machine, you will be stitching everything by hand. This includes gathering materials, measuring your head circumference, cutting out your fabric, and Sewing the two sides together. The main difference is that everything will be done by hand rather than with a machine. This means that it may take longer to complete, but it can be a more satisfying process overall.
Design Techniques for Creating a Unique Hat

There are many ways to sew a hat, but some design techniques can make your hat truly unique. Here are a few ideas:
- Use different fabrics for the brim and body of the hat. This can add visual interest and texture.
2. Incorporate trims or appliques into the design. This can be anything from lace to ribbon to sequins.
3. Create interesting shaped brims. You can use bias tape or wire to create curved or angled brims.
4. experiment with different stitching techniques. Use contrasting thread colors or stitch in a decorative pattern.
Troubleshooting Common Problems When Sewing a Hat
If you’re having trouble sewing a hat, don’t worry! There are some common problems that can be easily fixed.
One common problem is that the fabric doesn’t lay flat when you’re trying to sew it. This can be fixed by ironing the fabric before you start sewing. Another common problem is that the seams of the hat are too visible. This can be fixed by using a seam sealant or by stitching the seams from the inside of the hat.
If you’re still having trouble sewing a hat, there are plenty of resources available online or at your local library. With a little patience and practice, you’ll be able to sew a perfect hat in no time!

Finishing Touches: Adding the Final Details to Your Hat
After you’ve sewn the main body of your hat, it’s time to add the finishing touches! Here are some tips on how to do this:
- Choose a lining fabric that contrasts with the outer fabric of your hat. This will make it easier to see what you’re doing when you’re sewing the lining onto the hat.
- Cut out a circle of lining fabric that’s slightly smaller than the circumference of your hat. Sew this circle onto the wrong side of the outer fabric, leaving a small opening at the top.
- Turn your hat right-side out and stuff the lining into it. Sew the opening closed, then tuck in any raw edges and hand-sew them down.
- Add any embellishments you want, such as a ribbon or bow.
Conclusion

Sewing a hat doesn’t have to be difficult! By following our simple steps, anyone can easily learn how to sew a hat. You’ll soon find yourself with the perfect accessory for any outfit and an extra sense of accomplishment from having created something all on your own. So why not grab some fabric and get started? With patience and practice, you’ll soon become an expert at sewing hats in no time!