
Have you ever been in a situation where your favorite shirt suddenly rips, leaving you devastated? Well, fear not! With this ultimate guide to sewing a ripped shirt, you can give it a new life and wear it with pride once again. Whether you’re an experienced sewer or just starting out, our step-by-step instructions will help you mend any tear like a pro. So grab your needle and thread and let’s get started on reviving your beloved clothing item!

Introduction To Sewing a Ripped Shirt
If you’re like most people, you have at least one ripped shirt in your closet. And while it’s easy enough to throw away or donate a ripped shirt, what if you could fix it instead? With a little time and effort, you can sew a ripped shirt and extend its life!
This guide will show you how to sew a ripped shirt step-by-step, so you can save your clothes and money. We’ll cover everything from prepping the fabric to finishing the repair, so you’ll be an expert in no time. Let’s get started!
What You’ll Need
-Sewing kit including a needle, thread, and scissors
-Rape measure
-Euler or straight edge
-Fabric pen or pencil
-Seam ripper
-Iron and ironing board (optional)
-Sewing machine (optional)
Steps to Sew a Ripped Shirt
Assuming you have a ripped shirt that you would like to sew, follow these steps:
Step 1: Gather the Supplies
To sew a ripped shirt, you will need the following supplies:
- A needle and thread
- A piece of fabric to use as a patch (optional)
- Scissors
- A seam ripper (optional)
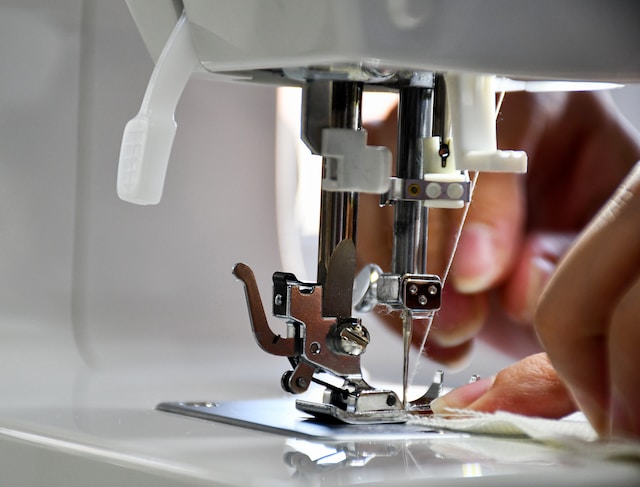
If you have a sewing machine, you may also find it helpful to use that for this project. However, it is not necessary.

Step 2: Prepare the Torn Fabric
If your shirt is already ripped, then you can skip to the next step. If not, then you will need to tear your fabric before you can start sewing.
To do this, first lay your shirt flat on a surface. Then, using a sharp pair of scissors, cut 1-2 inch strips vertically along the seams of your shirt. Once you have cut all of the strips, carefully tear each strip along the seam line.
Be careful not to rip the fabric too much – you want the strips to be about 1 inch wide. If they are too wide, they will be difficult to sew; if they are too narrow, they will be difficult to hold onto while you are sewing.
Once you have torn all of the strips, you are ready to move on to the next step!
Step 3: Pin the Torn Pieces Together

Bring the two torn pieces of your shirt together and pin them along the ripped seam. If the tear is large, you may need to use multiple pins to keep the fabric together. Once you have the pieces pinned together, try on the shirt to make sure that the fit is still comfortable. If it isn’t, make any necessary adjustments before sewing the seam back together.
Step 4: Sew the Torn Pieces Together
Once you have torn the pieces of your shirt apart, it is time to start sewing them back together. To do this, you will need a needle and thread, as well as some fabric glue.
If you are using a needle and thread, start by threading the needle and then tying a knot at the end. Once you have done this, start sewing the two pieces of fabric together by putting the needle through one side of the fabric and then coming up through the other side. Continue doing this until the two pieces of fabric are securely sewn together.
If you are using fabric glue, start by applying a generous amount of glue to one side of the fabric. Then, press the two pieces of fabric together and hold them in place for a few minutes until the glue has dried.
Step 5: Finish the Seams and Hemming

After you have sewn the new seams in your shirt, it is time to finish them. You can do this by either serging the edges or using a zigzag stitch. If you are using a zigzag stitch, be sure to backstitch at the beginning and end of each seam to secure it.
Once all of the seams are finished, it is time to hem the shirt. Again, you can either serge the edges or use a zigzag stitch. If you are using a zigzag stitch, be sure to backstitch at the beginning and end of each hem.
Once the hems are finished, your shirt is ready to wear!
Troubleshooting Tips for an Unsuccessful Repair Job
If your repair job is unsuccessful, there are a few things you can do to troubleshoot the issue. First, check to see if the fabric is ripped or frayed. If the fabric is ripped, you will need to sew a patch over the hole. If the fabric is frayed, you will need to trim the excess thread and fabric with scissors.
Next, check to see if the needle is bent or broken. If the needle is bent, you will need to replace it with a new one. If the needle is broken, you will need to remove it from the fabric and insert a new one.
Check to see if the thread is tangled. If the thread is tangled, you will need to untangle it and start again.
If you are still having trouble after following these tips, please feel free to contact us for further assistance.

Conclusion
Sewing your own ripped shirt is a great way to save money and give your wardrobe an upgrade. With the step-by-step instructions in this guide, you’ll have no trouble mending any rips or tears that happen in the future. Once you’ve followed these steps, you can be sure that all of your clothes will look as good as new again! So be sure to practice these techniques and soon enough, you’ll become a master seamstress. Happy sewing!
FAQs
Can you sew a ripped T-shirt?
Yes, I can guide you on how to sew a ripped T-shirt. First, gather a needle, thread that matches the color of your shirt, and some scissors. Trim any loose threads around the rip and turn the shirt inside out. Start sewing a straight line along the tear, using small, even stitches. Make sure to pull the thread tightly to secure the seam. Continue sewing until you reach the end of the rip, and then tie off the thread. Finally, trim any excess thread and turn the shirt back the right way.

What stitch is best for a ripped shirt?
For sewing a ripped T-shirt, the best stitch to use is the straight stitch. This simple and durable stitch provides a strong repair that can withstand regular wear and tear. Begin by knotting the thread and inserting the needle from the inside of the fabric. Take small, even stitches along the rip, placing the needle through both sides of the fabric. Pull the thread taut after each stitch to ensure a secure seam. The straight stitch is versatile and can be used for both small and large tears, making it an ideal choice for repairing ripped T-shirts.